Tags from VMware vSphere to Nutanix Categories

In a previous post i created a workflow to migrate System Center Virtual Machine Manager CustomAttributes to Nutanix Categories and values.
I received a request to write this for VMware vSphare Tags as well. So here is a updated workflow to migrate your VMware vSphare Tags to Nutanix Categories and Values
Note: I will not go in to as mutch detail as i did in my previous post. The workflow is basically the same, but against vSphere, for more details and breakdown of the script, reffer to the previous post :)
Step1: Get all the VM and Tags data from vSphere using Powershell
First install VMware.PowerCLI module if you do not have that Powershell module installed. It's easiest to do that via the below command.
Install-Module -Name VMware.PowerCLIThen we're going to run a powershell script to extract the information we need.
Import-Module VMware.PowerCLI
$credential = Get-Credential
Connect-VIServer -Server <VCENTERSERVERNAME> -Credential $credential
# Retrieve all virtual machines
$vmList = Get-VM

# Create an array to hold the output
$output = @()

# Loop through each VM
foreach ($vm in $vmList) {
    # Get tags assigned to the current VM
    $tags = Get-TagAssignment -Entity $vm
    # Generate a list of tag names
    $tagNames = $tags | ForEach-Object { $_.Tag.Name }

    # Create a custom object with the VM name and tags, VMName first
    $outputObj = New-Object PSObject -Property @{
        VMName = $vm.Name
        Tags = $tagNames -join ', '
    }

    # Add the object to the output array
    $output += $outputObj
}

# Export the output to a CSV file
$output | Select-Object VMName, Tags | Export-Csv -Path "vm_tags.csv" -NoTypeInformation
Now you should have a csv file that looks something like this:

Note: If you cant install it via the Install-Module command, maybe you're on a bastion-host that lacks internet connection, or for some other reason. Go to this page for reference on how to install manually or "offline":
Step2: Create the categories and assosiate the VMs with the Virtual Machines in Nutanix:
Create a new ansible playbook with the apropriate name, I will call mine crate_categories_vsphere.yml
The playbook looks like this:
#code: ansible
- name: Create CustomAttributes as Category and Values.
  hosts:
    - localhost
  connection: local
  gather_facts: false
  vars_files:
    - vars/nutanix_info.yml
    - vars/secrets.yml
  collections:
    - nutanix.ncp
  module_defaults:
    group/nutanix.ncp.ntnx:
      nutanix_host: "{{ pc_ip }}"
      nutanix_username: "{{ vault_pc_username }}"
      nutanix_password: "{{ vault_pc_password }}"
      validate_certs: false
  tasks:
  ## Gather information from CSV file ##
  - name: Read VM Custom Attributes from CSV
    community.general.read_csv:
      path: vm_tags.csv
    register: vm_tags_csv

  - name: Construct Custom Attributes list for each VM
    ansible.builtin.set_fact:
      vm_custom_tags: >-
        {{
          vm_custom_tags | default({}) | combine(
            { item.VMName: (item.Tags | default('') | split(", ")) }
          )
        }}
    loop: "{{ vm_tags_csv.list }}"
    loop_control:
      loop_var: item

  ## Gather information about VMs and construct list of category values and vm UUIDs ##
  - name: "Nutanix: Gather Facts about VMs"
    nutanix.ncp.ntnx_vms_info:
      filter:
        vm_name: "{{ item }}"
      kind: vm
    register: vm_facts
    loop: "{{ vm_custom_tags.keys() | list }}"
    loop_control:
      loop_var: item

  - name: Construct vm_info_list with VM names, UUIDs, and custom attributes
    ansible.builtin.set_fact:
      vm_info_list: "{{ vm_info_list | default([]) + [vm_info_item] }}"
    vars:
      vm_info_item: >-
        {
          "vm_name": "{{ vm_item.item }}",
          "custom_tags": "{{ vm_custom_tags[vm_item.item] }}",
          "vm_uuid": "{{ vm_item.response.entities | map(attribute='metadata') | map(attribute='uuid') | first | default('') }}"
        }
    loop: "{{ vm_facts.results }}"
    loop_control:
      loop_var: vm_item
    no_log: true

  ## Gather information about the Category and create it if it does not exists ##
  - name: Check if category exists
    nutanix.ncp.ntnx_categories_info:
        name: "vSphere-Tags"
    register: category_info_result

  - name: Create category if it does not exsist
    nutanix.ncp.ntnx_categories:
      state: "present"
      name: "vSphere-Tags"
      desc: "Automated Category Migrated from VMware vCenter"
    when: category_info_result.response | dict2items | length == 0
    register: category_creation_result

  - name: Gather updated info about the category
    nutanix.ncp.ntnx_categories_info:
        name: "vSphere-Tags"
    register: updated_category_info_result

  ## Gather information about the Category values and determine the non existing category vales ##
  - name: Set fact for non-existing category values
    ansible.builtin.set_fact:
      non_existing_category_values: "{{ (vm_custom_tags.values() | flatten | unique) | difference(updated_category_info_result.response.category_values.entities | map(attribute='value') | list) }}"

  ## IF there is non existing category values add dem to the Category ##
  - name: Add non-existing values to the category
    nutanix.ncp.ntnx_categories:
      state: "present"
      name: "vSphere-Tags"
      values: "{{ non_existing_category_values }}"
    when: non_existing_category_values | length > 0
    register: category_update_result

  ## Add Categories and Values to VMs ##
  - name: Update VMs with category values
    nutanix.ncp.ntnx_vms:
      vm_uuid: "{{ item.vm_uuid }}"
      categories:
        vSphere-Tags: "{{ vm_custom_tags[item.vm_name] }}"
    loop: "{{ vm_info_list }}"
    loop_control:
      loop_var: item
    when: item.vm_uuid | length > 0
Conclusion
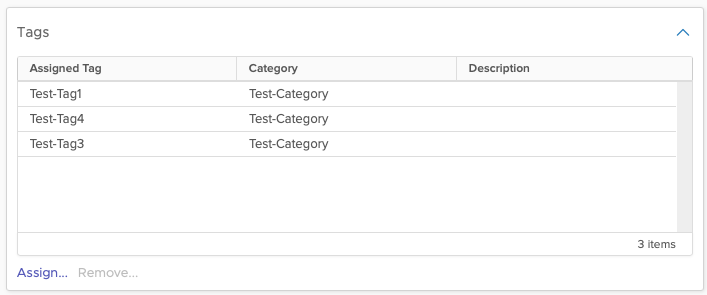
And there you go. Updated version of my workflow to extract the VM Tags from VMware vSphere to Nutanix Categories, enjoy.