Nutanix P2V using VMware Converter

Background:
We have a customer witch is going to move from a competitors datacenter. The competitor does not allow us to gain access to their Hyper-V hosts management network (Understandable) so the use of Nutanix Move is not an option here.
Also, the customer would like as little downtime on their Virtual Machines as possible, so, upload/copy of the VHDX files from competitor to FTP is also not an option because it’s a lot of data that needs to be processed and the copy-times would be unacceptable for the customer.
Use VMware vConverter to dump vmdk files on FTP? Then upload them to Nutanix Cluster as Image? To slow, and to mutch downtime for the customer.
So, how to solve the above problem? Nest a VMware Esxi Host within AHV and connect the esxi-host towards a migration Container, migrate the VMs using P2V with VMware vConverter. Follow the steps stated below to complete the guide.
DISCLAIMER:
This is not supported by neither VMWare nor Nutanix, so use this at your own risk. We have done this within a test environment. Versions used for this Guide:
- VMware ESXI 6.7.0
- AOS 5.15.5
- AHV 20190916.410
Step1:
Start by downloading VMware ESXI 6.7 from their website.
https://customerconnect.vmware.com/web/vmware/evalcenter?p=free-esxi6 (VMware account needed)
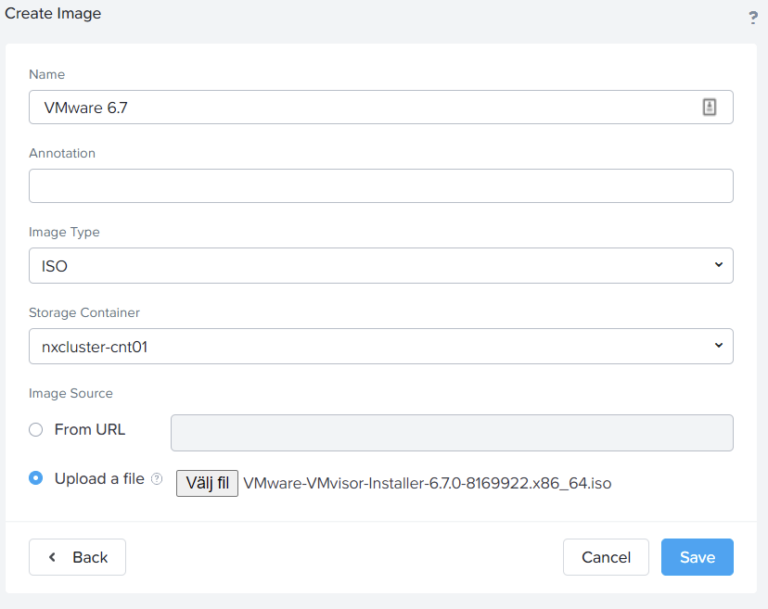
Step2:
Upload the VMware 6.7 ISO-Image to your desired Target Cluster
Step 3:
Create a New VM.
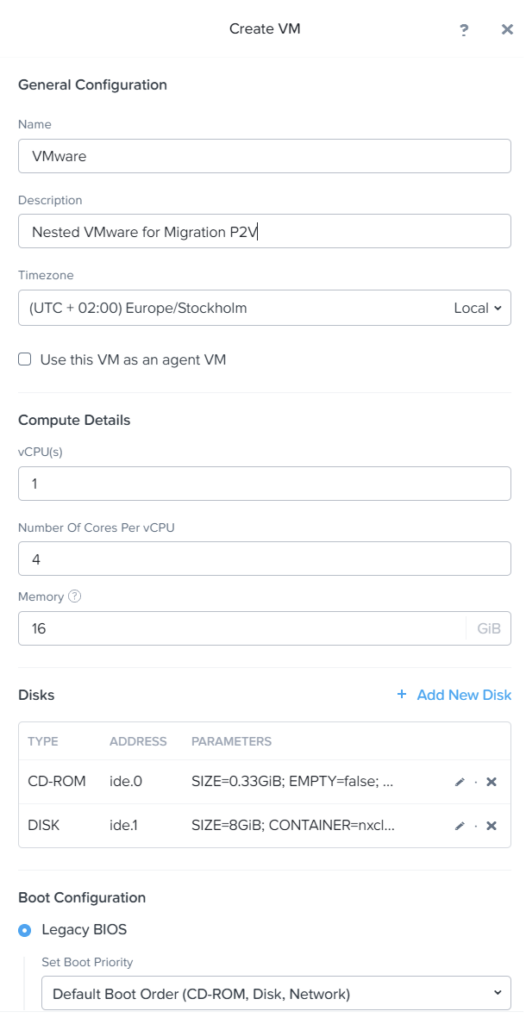
Attach The ISO you created in Step2.
Attach a IDE disk with 8GB of Space to the VM.
DO NOT CREATE ANY NICS, This will be done in next step via ACLI.
Step 4:
Connect with SSH to a CVM and enter acli.
Run the following commands.
### NIC1 ###
vm.nic_create <VMname> model=e1000 network=<vlanID Faceing customer VMs via VPN>

### NIC2 ###
vm.nic_create <VMname> model=e1000 network=<vlanID Faceing AHV for NFS access>

### Enable CPU Passthrough ###
vm.update <VMname> cpu_passthrough=true

### Power on the VM ###
vm.on <VMname>
Step 5:
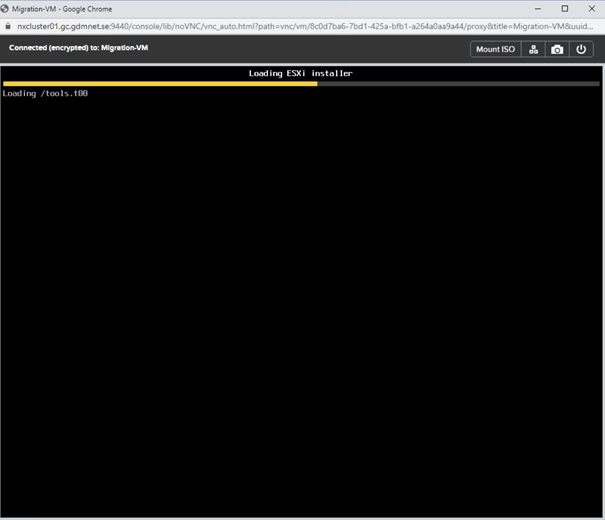
Go to Prism Central/Elemens, and launch the Console of newly created VM.
Follow the OnScreen instructions to install VMware esxi.
When installation finishes, set a management address on NIC1 that you created on Step 4 above, this VLAN will face the source servers. In my case it’s 10.10.0.40/24
Step 6:
Connect to the VMware webGUI on the adress you configured in step 5.
In my case it’s https://10.10.0.40
Go to Networking and add a new vSwitch, in my case i named the vSwitch “Storage”.
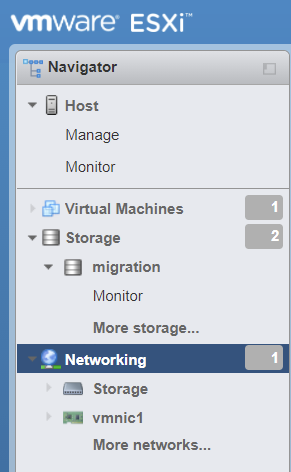
Add the switch uplink to NIC2 that you created witch is faceing the AHV cluster in step 4.
Then go in to the “VMkernel NICs” tab. And create a new VMkernel NIC.
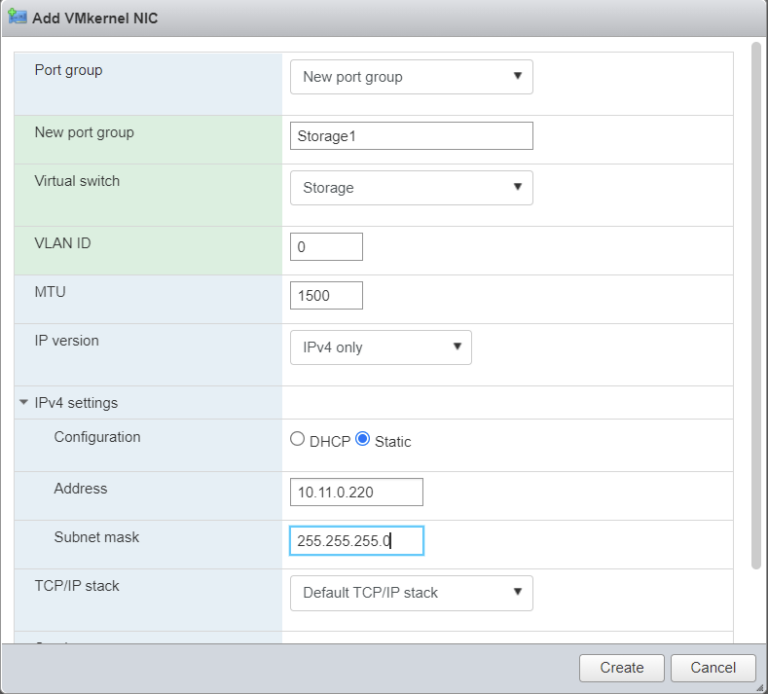
Set the address to a free IP-number on the VMkernel NIC to a ip-adress in the Vlan you created NIC 2 in step 4.
This will be used to add the NFS storage.
Step 7:
Go back to Prism Elements of your target cluster.
Go to Storage, and create a new Container.
I choose to name my Container “migration”. I choose to set the max capacity to 3 TiB, just for controls sake.
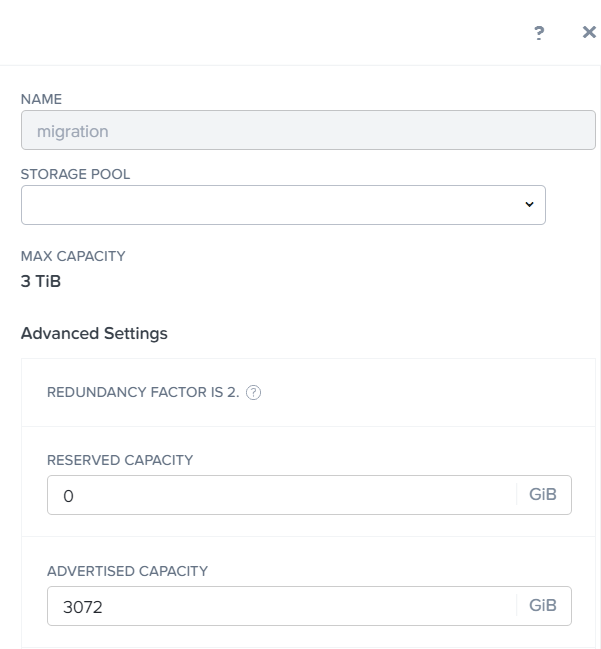
Add the IP that you set in step 6 to the Filesystem Whitelist.
In my case it’s 10.11.0.220/255.255.255.255
Step 8:
Connect with SSH to your nested VMware host that you installed earlier.
Run the below command.
[root@localhost:~] esxcfg-nas -a migration -o 10.11.0.50 -s /migration-a is the name for your VMware datastore, name it to whatever
-o is the virtual IP of your Nutanix AHV cluster
-s is the name of the Container you created in Step7.
You should now get the following respons from your above commands.
Connecting to NAS volume: migration
migration created and connected.
Step 9:
Go to the source VM what you want to migrate to AHV.
Install VMware vconverter from the following url:
https://customerconnect.vmware.com/en/downloads/details?downloadGroup=CONV62&productId=701&rPId=20180 (VMware account required).
Step 10:
Install Nutanix VirtIO drivers to the server that yo want to migrate. You can use the method from my previous post regarding a temp Move Repo to ease things out.
Launch VMware Converter.
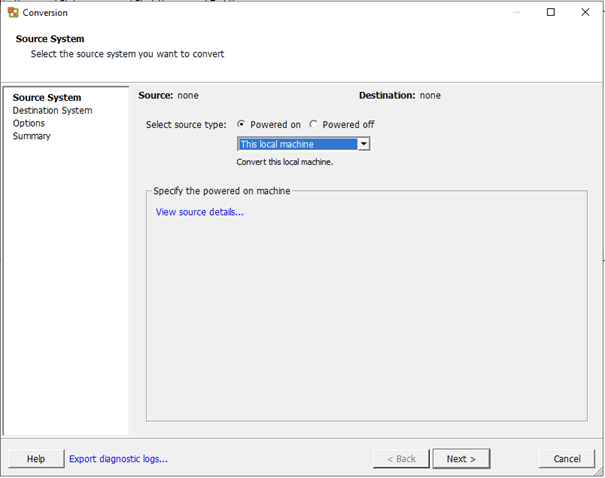
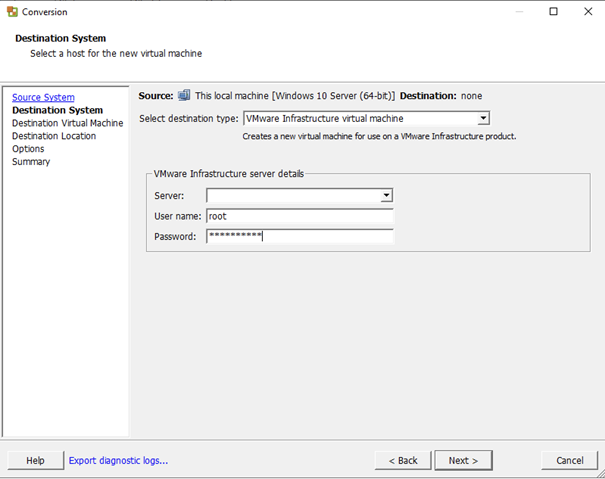
Select Destination type: VMware Infrastructure virtual machine.
Server: Enter the IP that you configured in Step 6.
Username: root
Password: the password you configured during installation in step 5
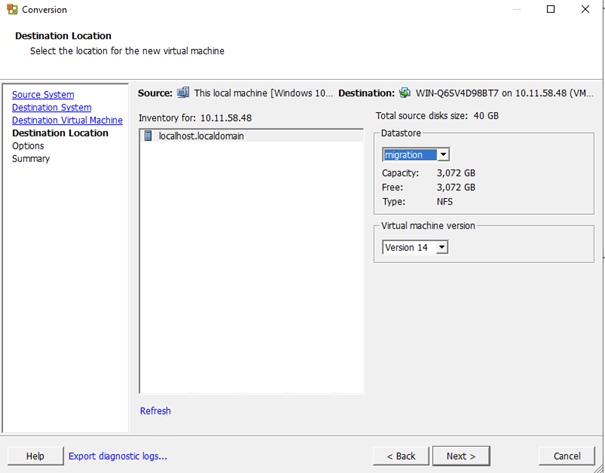
Select the datastore that you created in step 8.
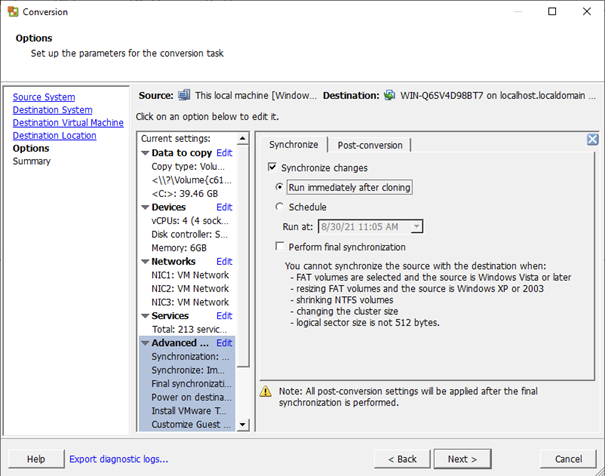
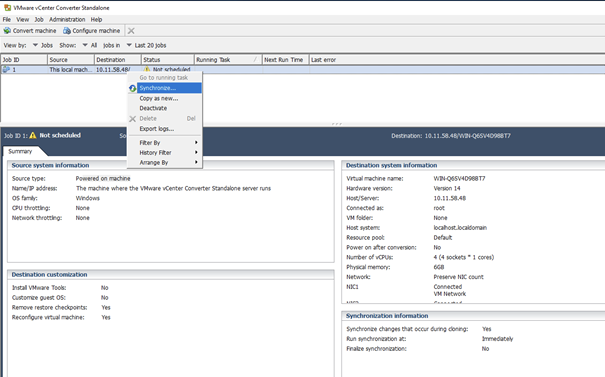
This step is optional, but i will not perform Final Synchronization on the Virtual machines. I prefer to do that at a later stage by manually invoking the sync, this way i can prestage the migration, and i can do a couple of syncs a day up to the cut-over date.
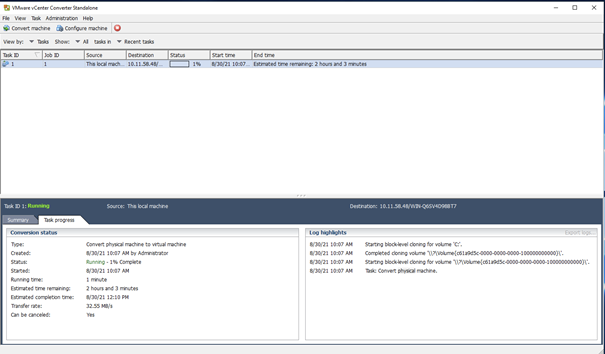
Start the migration, and monitor the progress for errors. We can also monitor the speed etc in the storage container:

When the initial sync of the server is done, you can manually sync it:

At your cut-over time, performe the “final synchronization:
Step 11:
Now you can go in to the VMware web GUI and browse the datastore.
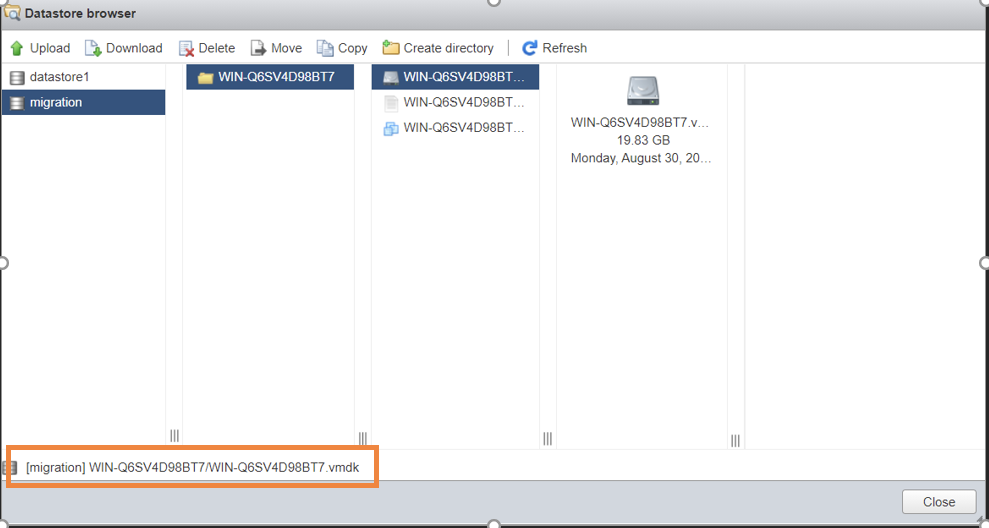
At the left hand corner you can se the URL to the VMDK of the disk-file.
Copy the path. Store it for later.
Now, ssh to a CVM in the Cluster, and run the following acli command:
image.create <nameofyourimage> source_url=nfs://127.0.0.1/migration/WIN-Q6SV4D98BT7/WIN-Q6SV4D98BT7.vmdk container=migration image_type=kDiskImageUse the URL that you copied from the datastore browser, in my case it’s WIN-Q6SV4D98BT7/WIN-Q6SV4D98BT7.vmdk, and in the source_url=parameter above, we add nfs://127.0.0.1/migration/ before the copied path from the datastore browser. resulting in the path nfs://127.0.0.1/migration/WIN-Q6SV4D98BT7/WIN-Q6SV4D98BT7.vmdk
You should get a result like this:

You can run the command below to verify the results:
image.list
Step 12:
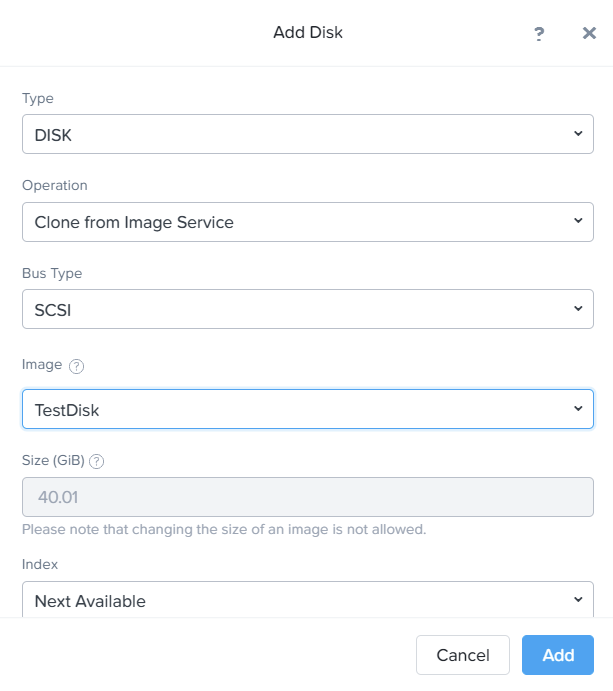
Now, go to Prism Elements/Prism Central and create a new VM.
Add the disk, and to clone it from Image Service:
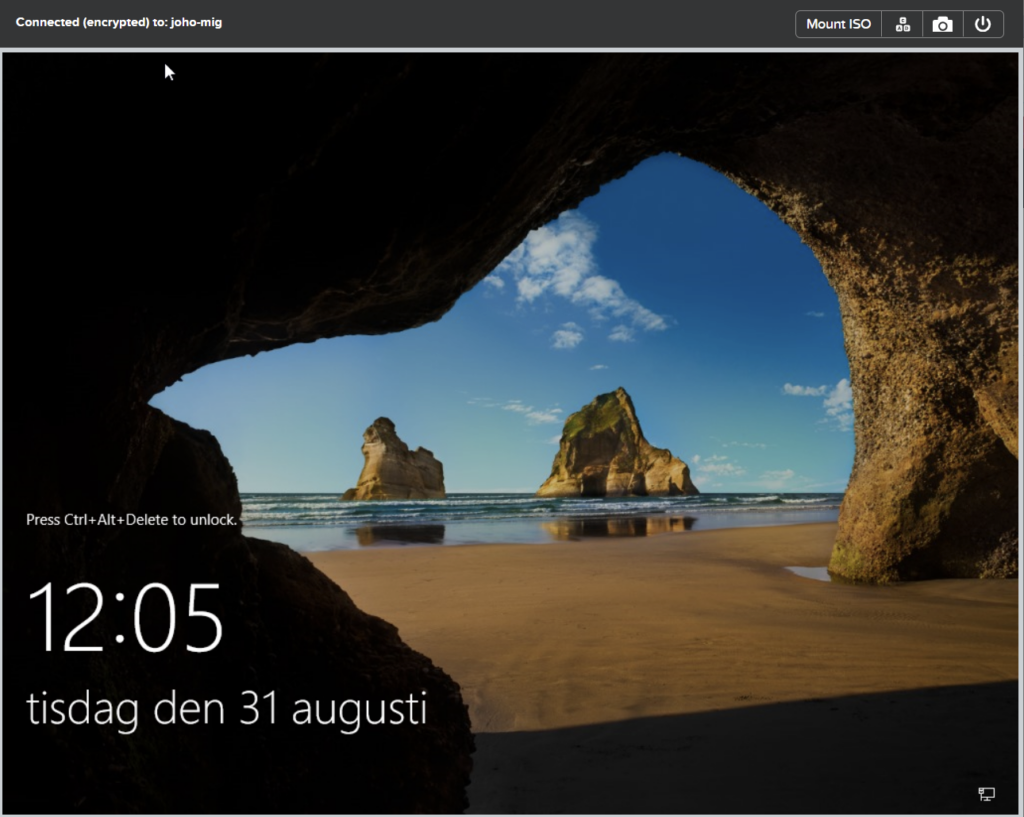
Boot your VM. And you’re all done
Notes:
Note 1: I tried to do this with Vmware 7.0 U2 first, that version did not recognize the Network cards, but 6.7 did:
Note 2: The VM you clone from the Disk Image you create will also be located in the same container (migration in this case). You can later move the VM to a production Container, in later AOS versions you can live-migrate using acli, but if you’re pre 5.19 you can use this .NEXT post to move the Disk-file manually
https://next.nutanix.com/how-it-works-22/migrating-vm-disk-to-a-different-container-on-ahv-33519
Note 3: Because you enable CPU Passthrough, remember to shutdown your VMware Nested VM before performing any rolling upgrades of the cluster, because it will prevent the VM to be live-migrated to another host.
Thanks for reading