DevOps Post 3: Using Rancher Fleet to handle cluster configuration and deploying the Nutanix CSI driver

Hi, now that we have the first RKE2 downstream cluster in place, you would start deploying some different workloads. To do that, we need to deploy manifests or Helm charts.
The best way to do that is by using Rancher's built-in continuous delivery module called Rancher Fleet Continuous Delivery and deploying the configuration from a Git repo.
In this article, we will deploy the Nutanix CSI driver with Fleet and deploy a persistent volume claim to test and look under the hood at what's happening.
Tag along!
Create the GIT repository.
First, we need to create the Git repository where we will store our configuration and manifests. In our case, we're using GitHub.
This article won't cover in detail how you create the Git repo, but there are plenty of guides out there. For example, this article from GitHub Docs:

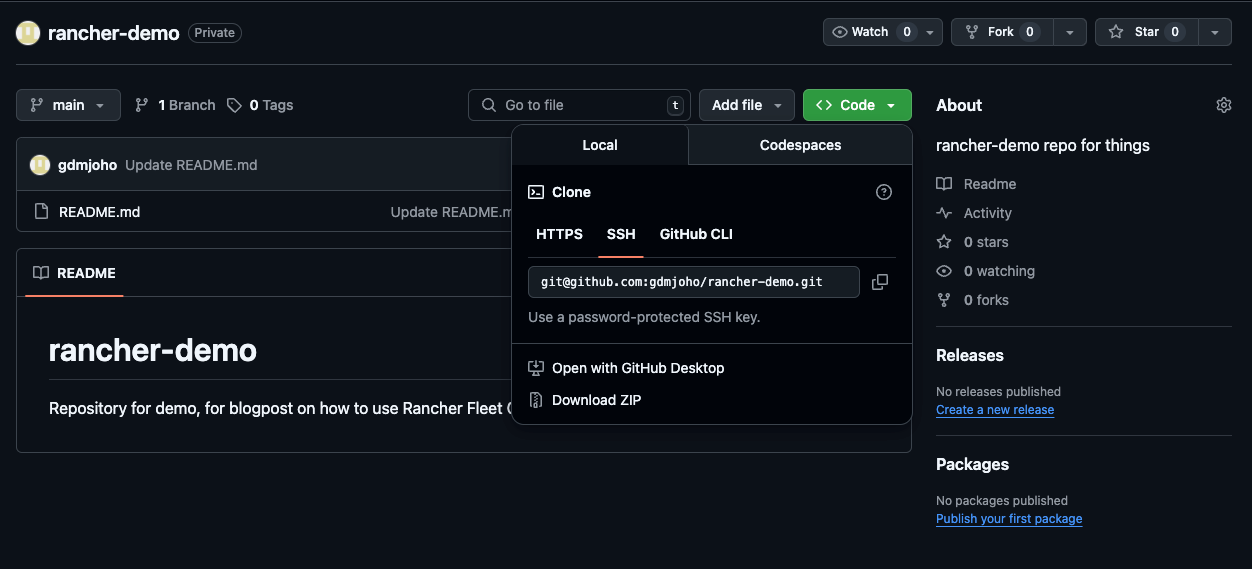
Once you have your repository created, go ahead and create a deploy key with read rights by pressing Settings, and then Deploy Keys:
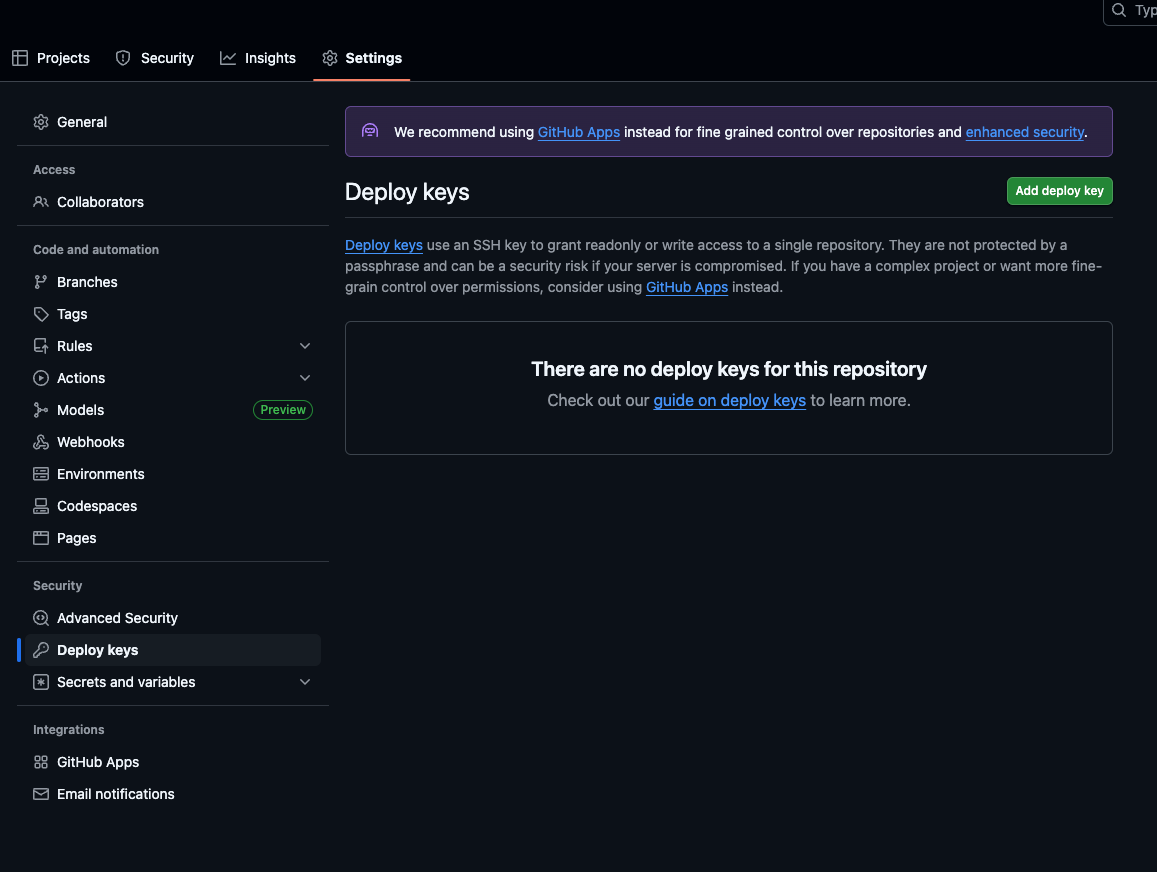
- Click Add Deploy Keys.
- In the Add new key window, name your deploy key. For the key, use SSH keygen on your Rancher Rocky machine and generate a new SSH key by running this command:
ssh-keygen -t ed25519 -f /home/rancher/ssh-keys-git/git-demoNow you should see an output that looks something like this:
Generating public/private ed25519 key pair.
Enter passphrase (empty for no passphrase):
Enter same passphrase again:
Your identification has been saved in /home/rancher/ssh-keys-git/git-demo
Your public key has been saved in /home/rancher/ssh-keys-git/git-demo.pub
The key fingerprint is:
SHA256:hA...60k root@rancher-demo
Next, reveal the public key using the following command:
cat /home/rancher/ssh-keys-git/git-demo.pubThe output should look something like this:
ssh-ed25519 AAAAC3Nz..................E/0qPYkvke1AN7naG root@rancher-demoNow repeat the above process with also the private key:
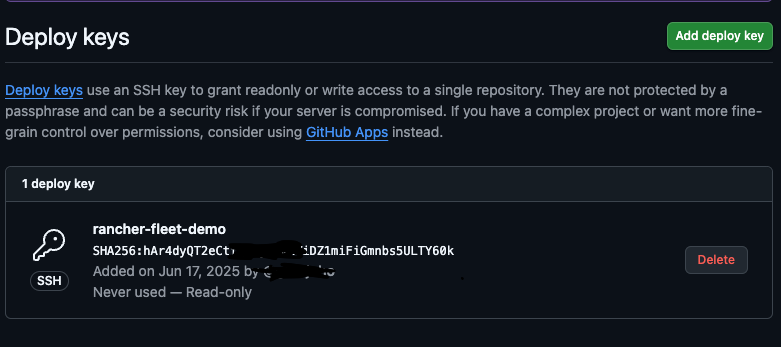
cat /home/rancher/ssh-keys-git/git-demoCopy the output from the public key and paste it into the Deploy Key window in GitHub, then click Add Key. Your repo should now look like this:
Now we have configured our Rancher repo.
Copy the private key and store it somewhere safe, like your password manager.
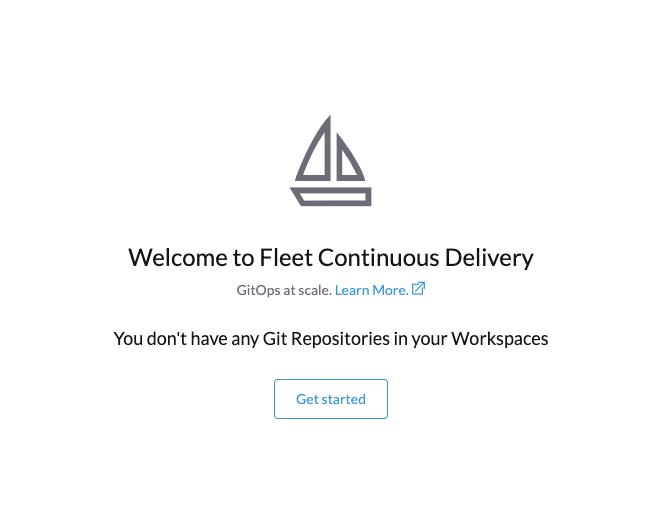
Configure Rancher Fleet CD
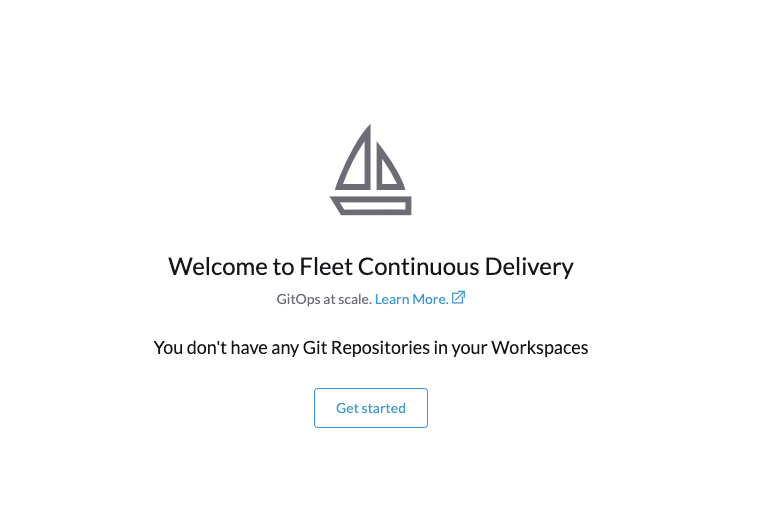
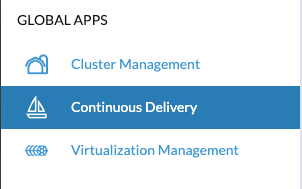
Now head back into the Rancher GUI and click Continuous Delivery in the left-hand menu.
Then click Get Started.
You will now arrive at the page where you can configure which Git repo you're going to use.
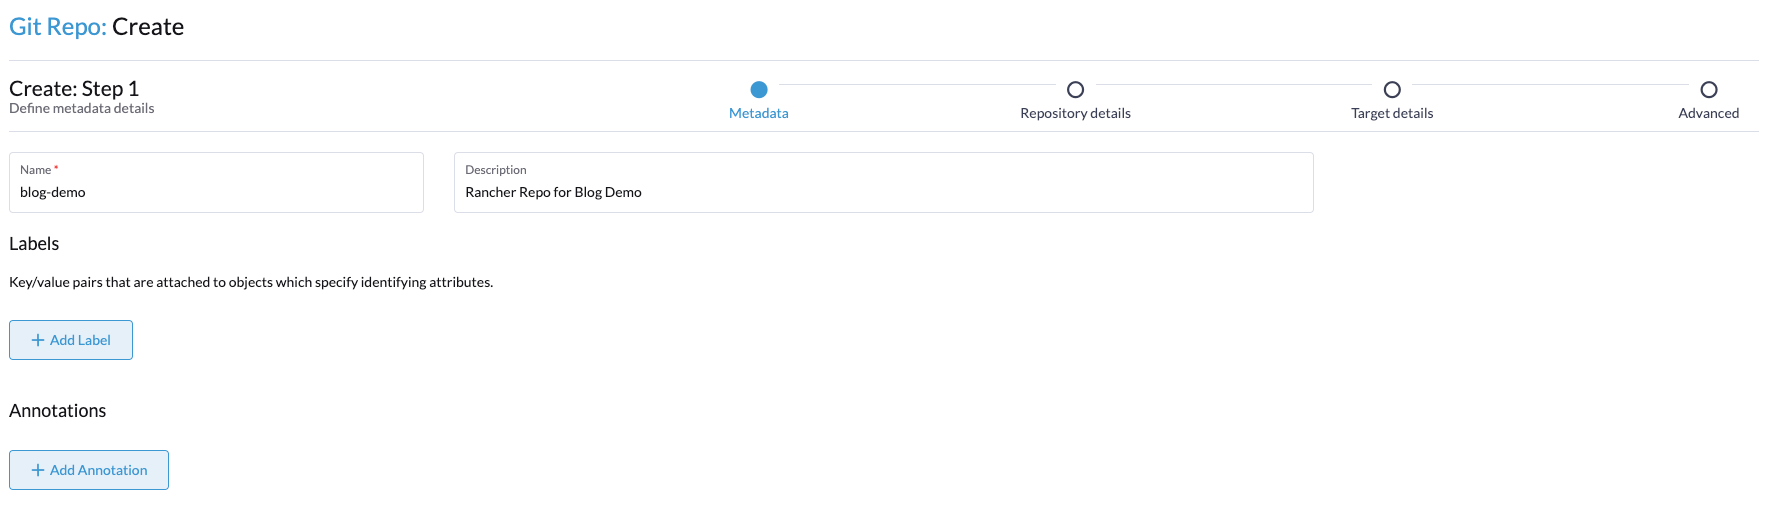
On the first page, name your repo and give it a description if you'd like. Click Next in the bottom right-hand corner.
On the next page, enter your repository URL and click Next.
You can find the repository URL on your Git repo's "index" page.
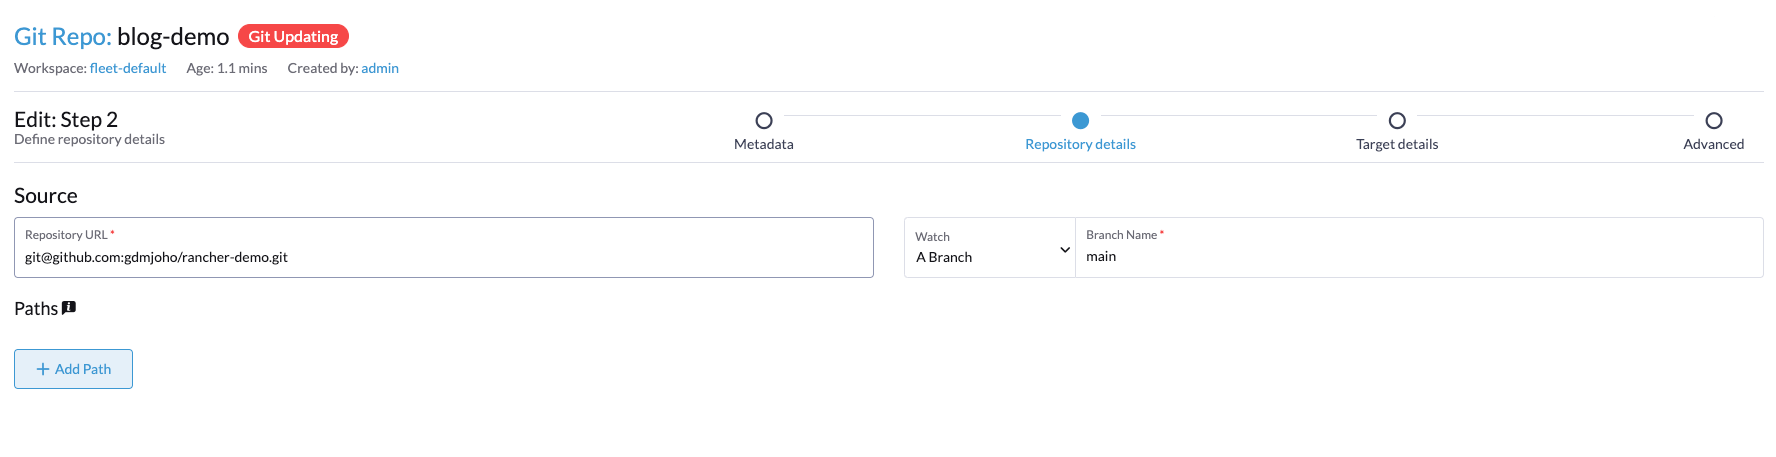
Click Next in the bottom right-hand corner.
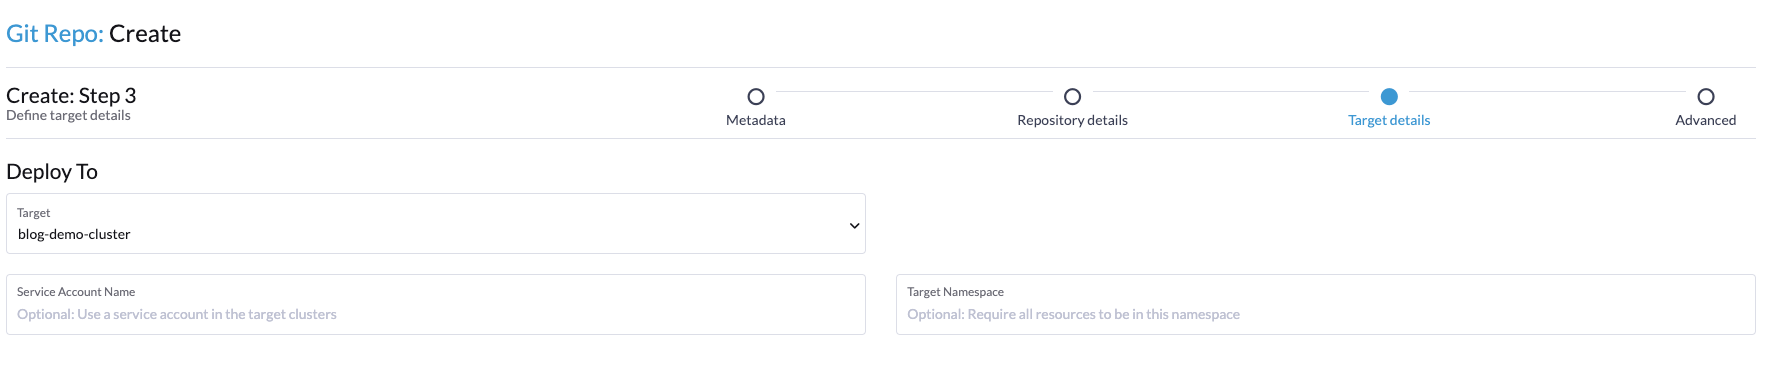
In step 3 of the wizard, configure which clusters you will target with the manifests/code. In this demo, we chose to deploy this with the target cluster blog-demo-cluster.
Then once again, click Next in the bottom right-hand corner.
Then once again, click next in the bottom right hand corner.
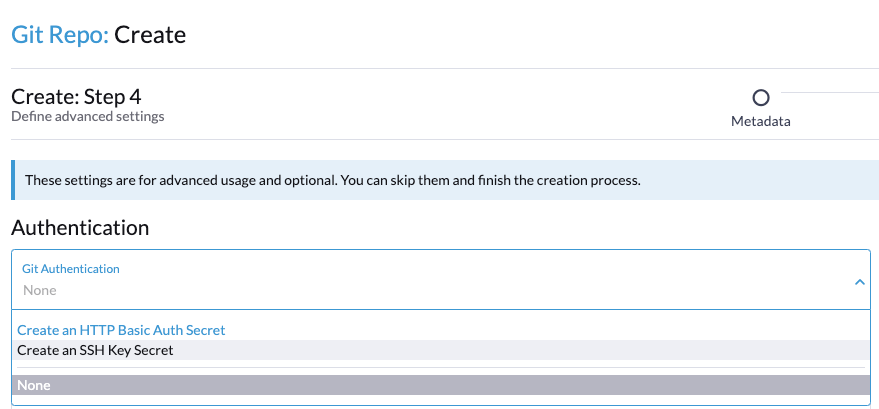
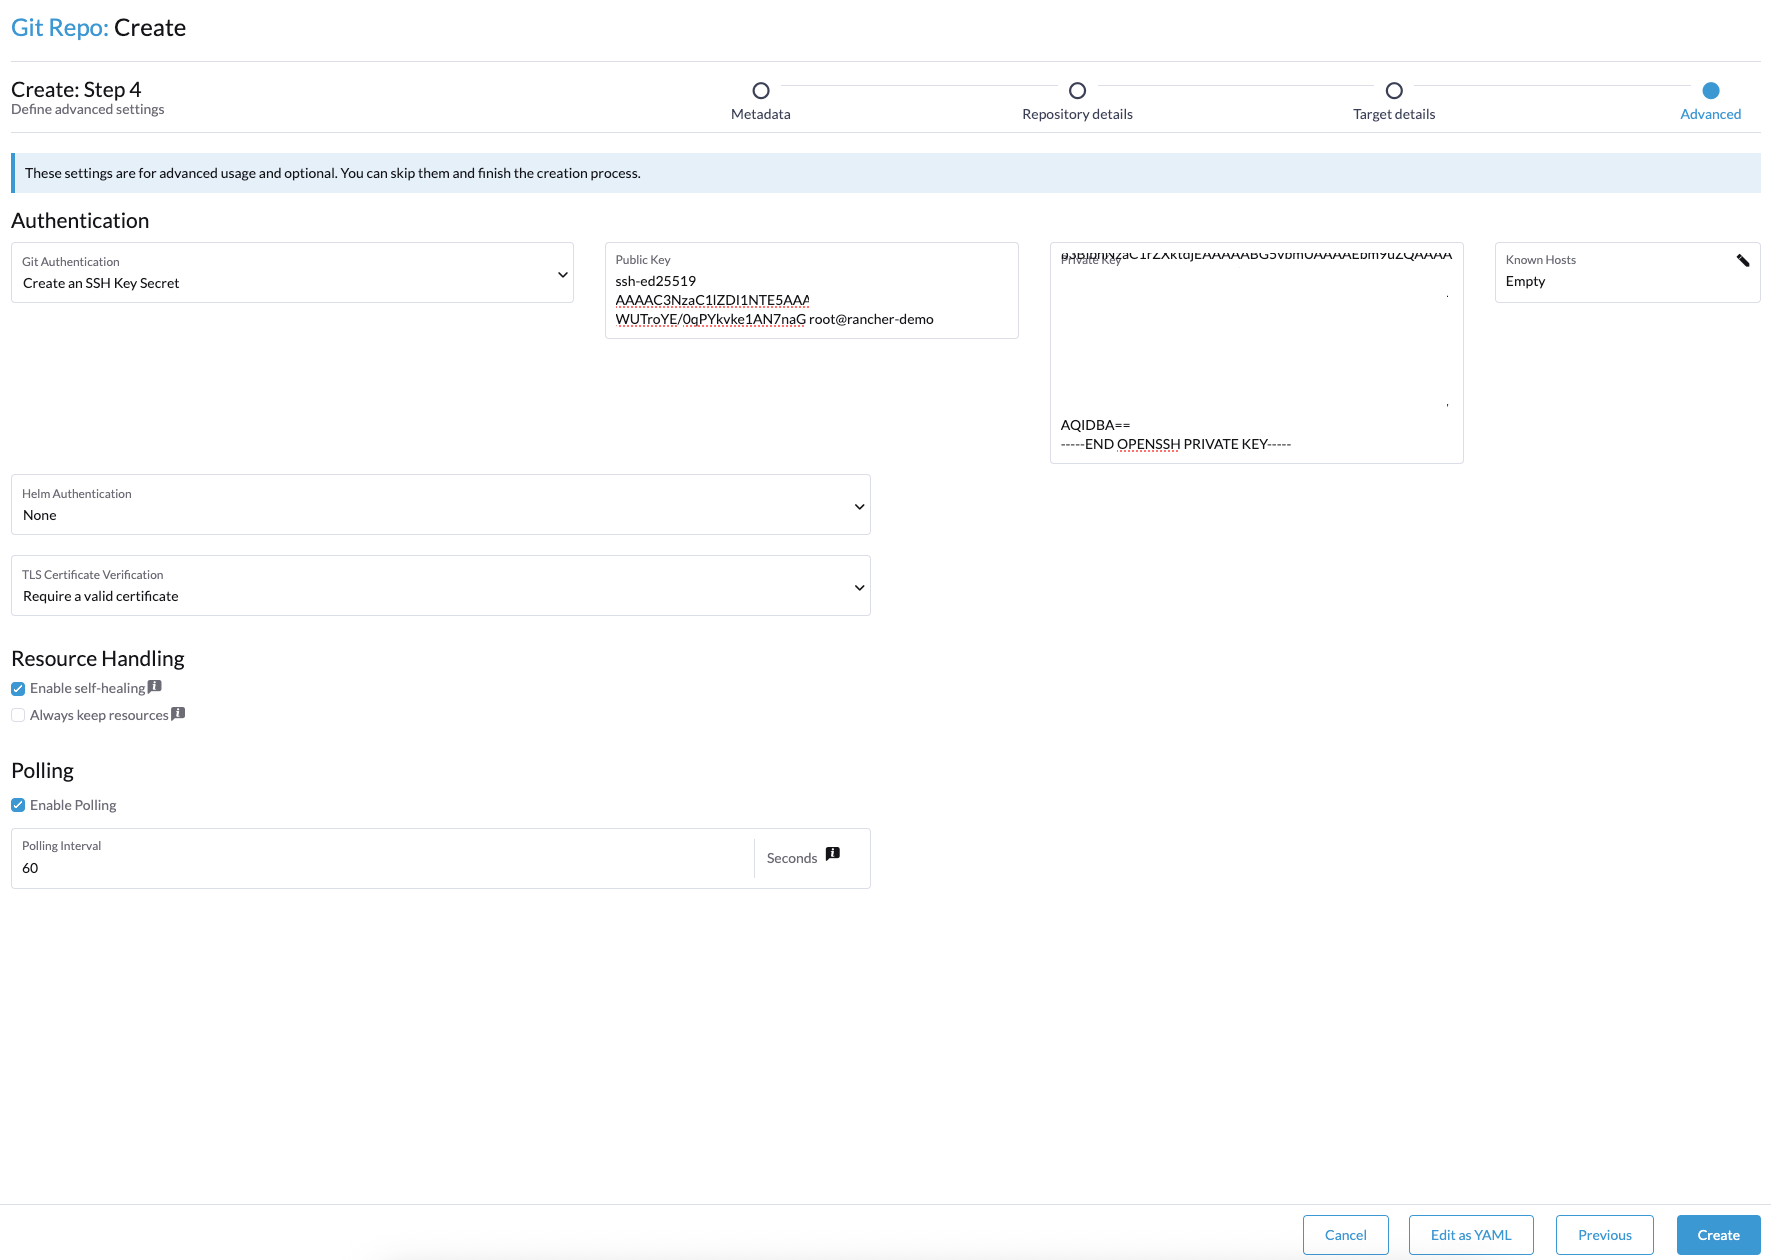
In step 4 of the wizard, configure the secret that we just created in Git. In the Authentication section, from the dropdown menu, choose Create an SSH key Secret.
Fields will appear to the right: Fill these in with the public key we revealed earlier, as well as the private key we copied in earlier stages of this post.
I always enable Self Healing so that if someone changes something manually in the cluster using CLI, the Git repo will heal it. This ensures that the code/manifests in the repo remain the source of truth. Permanent changes should always be made in the Git repo.
Your configuration should look something like this:
Click Create in the bottom right-hand corner.
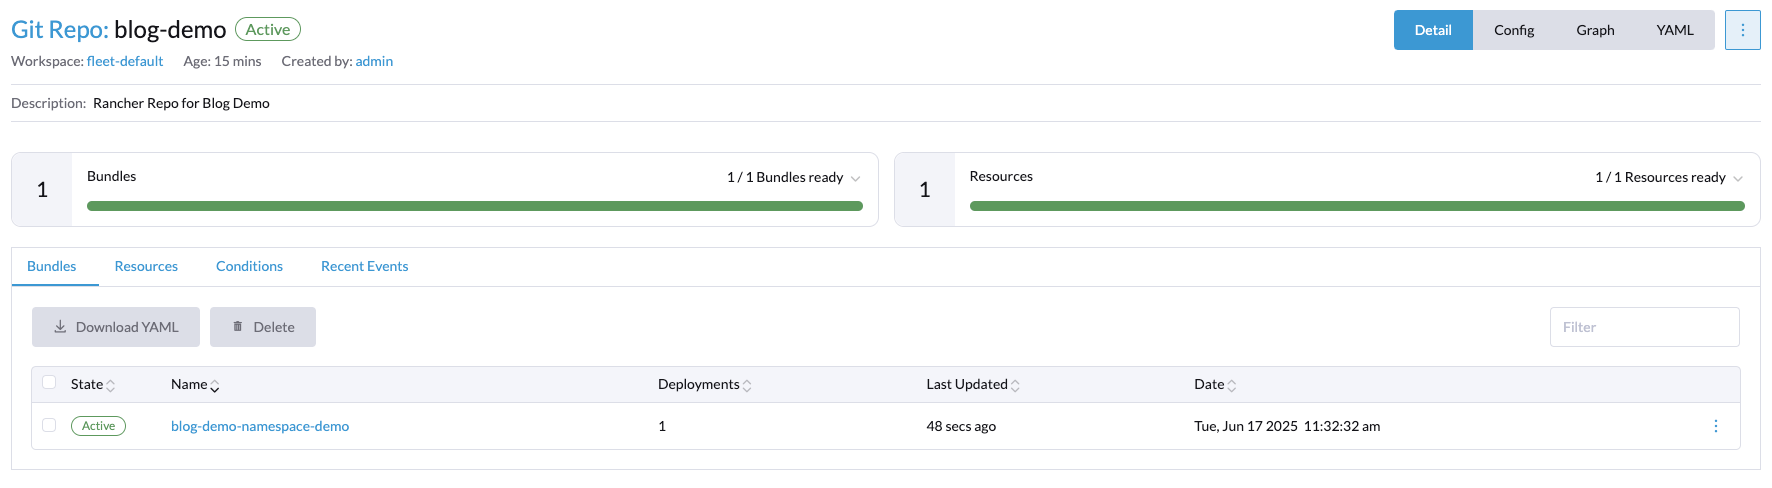
Now you should see that the repo is created and active but with an error message stating that there are no resources found to deploy.

So let's go ahead, try it out, and see if it works. Let's just add a simple manifest to deploy a new namespace. I have created this manifest in my repository and committed the changes to Git.
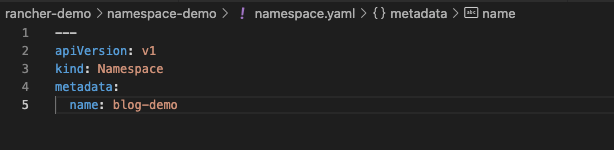
If we now head back into the Rancher GUI and go to the Git repo we just created, we will see that the namespace has been created.
Let's also verify that the namespace is created using the Rancher CLI:
[root@rancher-demo ~]# rancher kubectl get namespace -A
NAME                          STATUS   AGE
blog-demo                     Active   3m24s
cattle-fleet-system           Active   4d21h
cattle-impersonation-system   Active   4d21h
cattle-system                 Active   4d21h
default                       Active   4d21h
kube-node-lease               Active   4d21h
kube-public                   Active   4d21h
kube-system                   Active   4d21h
local                         Active   4d21h
As we can see, we have now created a namespace with Fleet.
Deploy Nutanix CSI driver using Fleet CD.
Now that we have configured our repository, let's go ahead and deploy the Nutanix CSI driver.
However, before we proceed, we need to discuss the Nutanix CSI driver service account and network requirements. Since the latest Nutanix CSI Driver, we no longer need to open ports toward the Prism Elements dataservices IP. Now the CSI driver supports "Hypervisor attached".
This is a game-changer for those building multi-tenant environments. We do not want to open ports from the cluster directly toward Prism Elements, and the volume group that needs to be created for the persistent volume claim will be directly attached.
So, now let's address the service account needed in Prism Central to deploy the CSI driver correctly.
For demo purposes, you can always use the built-in admin account from Prism Central. But for production environments, we recommend using a non-administrator account to perform CSI operations. Follow the link below to see the specific RBAC access that the user needs:
Once you have created your user, we're now ready to deploy the Nutanix CSI driver to the target cluster using Rancher Fleet.
I have created two folders in my repository. The first one is called nutanix-csi, and the other one is nutanix-storage-class.
First, we deploy the Nutanix CSI driver with the Helm chart. The fleet.yaml in the nutanix-csi folder looks like this:
defaultNamespace: ntnx-system
helm:
  releaseName: nutanix-csi-storage
  chart: https://github.com/nutanix/helm-releases/releases/download/nutanix-csi-storage-3.3.0/nutanix-csi-storage-3.3.0.tgz
  takeOwnership: true
  values:
    createSecret: false
    createPrismCentralSecret: false
    pcSecretName: ntnx-pc-secret
    csiCategoryConfigmapNamespace: ntnx-system
As you can see, we do not create any secrets; we will create them manually since we do not want to upload the secrets to github.
On the workstation where you have your Rancher CLI connected to the cluster, deploy a file that looks like this:
apiVersion: v1
kind: Secret
metadata:
 name: ntnx-pc-secret
 namespace: ntnx-system
data:
 # base64 encoded prism-ip:prism-port:admin:password.
 # E.g.: echo -n "10.0.00.000:9440:admin:mypassword" | base64
 key: MTAuMC4wMC4wMDA6OTQ0MDphZG1pbjpteXBhc3N3b3Jk
To generate the value that goes into key, follow the commented-out section in the above file. For example:
echo -n "nxtest01-pc.domain.com:9440:csi:Super-StronG-PassWord" | base64Save the file as pc-secret.yaml (or any other name you prefer). Then apply the secret to the Rancher cluster with the following command:
rancher kubectl apply -f pc-secret.yamlVerify in the Rancher GUI that the Nutanix CSI driver is deployed (it will be displayed as Wait Applied) until the secret is successfully deployed.

Once the Nutanix CSI operator is deployed, it should look like this in the Rancher CLI:
[root@rancher-demo ~]# rancher kubectl -n ntnx-system get pods
NAME                                      READY   STATUS    RESTARTS   AGE
nutanix-csi-controller-674dc46d56-jrsvd   7/7     Running   0          20s
nutanix-csi-controller-674dc46d56-n95b4   7/7     Running   0          20s
nutanix-csi-node-9bsdz                    3/3     Running   0          21s
nutanix-csi-node-rnbmk                    3/3     Running   0          21s
nutanix-csi-node-s4xf9                    3/3     Running   0          21s
Once all that is done, you should go ahead and create the storage class, which will also be set as the default. In the nutanix-storage-class folder in the Fleet repo, we have the following three files:
fleet.yaml
---
kustomize:
  dir: .

helm:
  takeOwnership: true
  force: true

dependsOn:
  - name: blog-demo-nutanix-csi
kustomization.yaml
---
resources:
  - nutanix-storage-class.yaml
nutanix-storage-class.yaml
---
allowVolumeExpansion: true
apiVersion: storage.k8s.io/v1
kind: StorageClass
metadata:
annotations:
storageclass.kubernetes.io/is-default-class: "true"
name: default-nutanix-storageclass
parameters:
csi.storage.k8s.io/fstype: xfs
hypervisorAttached: ENABLED
storageContainer: nxtest-cnt01
storageType: NutanixVolumes
provisioner: csi.nutanix.com
reclaimPolicy: Delete
volumeBindingMode: WaitForFirstConsumer
The file fleet.yaml contains some dependsOn logic so that the storage class is not deployed until the CSI Helm chart is successfully deployed.
The kustomization.yaml file specifies which YAML files in the folder Fleet should be applied and in what order.
The nutanix-storage-class.yaml file dictates what the storageContainerName is and other configurations.
For a full list of features/configuration options, refer to the documentation in the portal.
Once we have deployed all this through Rancher Fleet, it should look like this in the Rancher GUI:
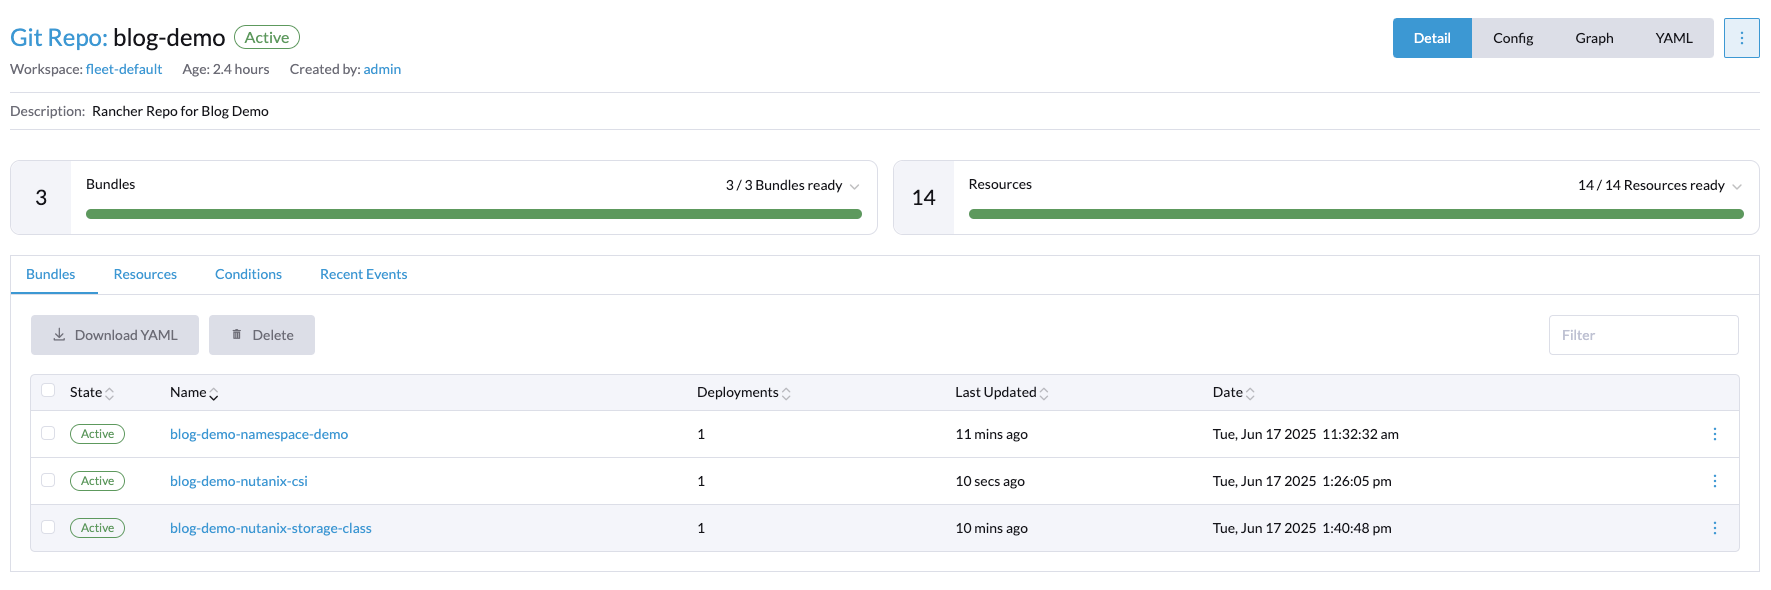
You can also run the following CLI command to verify that the storage class is present in the cluster. The response should look like this:
[root@rancher-demo ~]# rancher kubectl get sc -A
NAME                                     PROVISIONER       RECLAIMPOLICY   VOLUMEBINDINGMODE      ALLOWVOLUMEEXPANSION   AGE
default-nutanix-storageclass (default)   csi.nutanix.com   Delete          WaitForFirstConsumer   true                   11m
Now that we have everything in place, you can go ahead and deploy a test PVC to see if it's working:
Create a new folder in the repo called test-pvc. In that folder, create an empty fleet.yaml and then a test-app.yaml file:
apiVersion: v1
kind: PersistentVolumeClaim
metadata:
  name: test-app-pvc
spec:
  accessModes:
    - ReadWriteOnce
  resources:
    requests:
      storage: 5Gi
  storageClassName: default-nutanix-storageclass
---
apiVersion: v1
kind: Pod
metadata:
  name: test-app
spec:
  containers:
    - name: test-container
      image: nginx:latest
      ports:
        - containerPort: 80
      volumeMounts:
        - mountPath: "/usr/share/nginx/html"
          name: test-volume
  volumes:
    - name: test-volume
      persistentVolumeClaim:
        claimName: test-app-pvc
If we now run the following command:
rancher kubectl describe pvc test-app-pvc
You should see something like this:
Events:
Type Reason Age From Message
---- ------ ---- ---- -------
Normal WaitForPodScheduled 82s persistentvolume-controller waiting for pod test-app to be scheduled
Normal Provisioning 77s csi.nutanix.com_blog-demo-cluster-master-bppkq-jblml_bbeb4d5e-e402-4e88-a2cb-347aca95c356 External provisioner is provisioning volume for claim "default/test-app-pvc"
Normal ExternalProvisioning 42s (x5 over 77s) persistentvolume-controller Waiting for a volume to be created either by the external provisioner 'csi.nutanix.com' or manually by the system administrator. If volume creation is delayed, please verify that the provisioner is running and correctly registered.
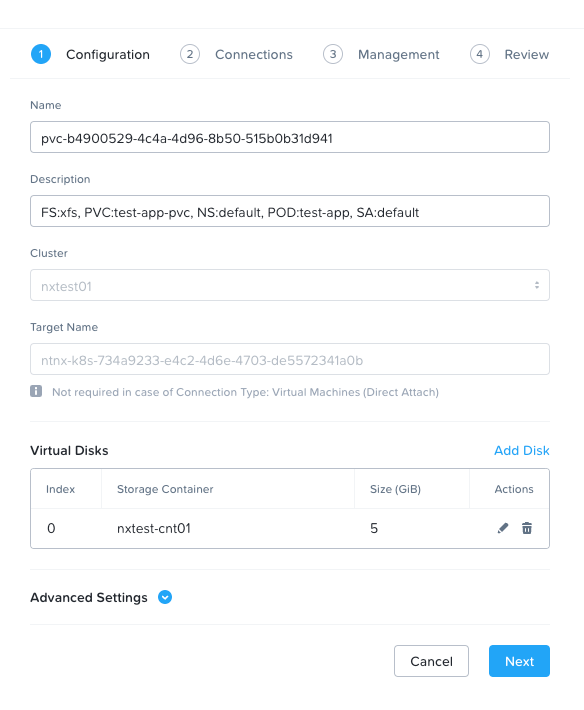
Normal ProvisioningSucceeded 29s csi.nutanix.com_blog-demo-cluster-master-bppkq-jblml_bbeb4d5e-e402-4e88-a2cb-347aca95c356 Successfully provisioned volume pvc-b4900529-4c4a-4d96-8b50-515b0b31d941And the app should have a PV connected to it. You can verify this by running:
[root@rancher-demo ~]# rancher kubectl get pv
NAME CAPACITY ACCESS MODES RECLAIM POLICY STATUS CLAIM STORAGECLASS VOLUMEATTRIBUTESCLASS REASON AGE
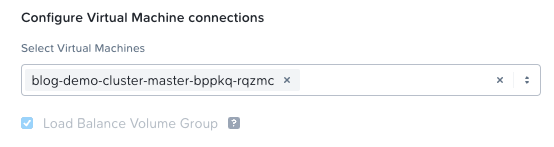
pvc-b4900529-4c4a-4d96-8b50-515b0b31d941 5Gi RWO Delete Bound default/test-app-pvc default-nutanix-storageclass <unset> 97sIf we now connect to Prism Central and take a look at the volume groups in the cluster, we can see the VG and that it's attached directly to the host where the pod is scheduled.

Everything works! And that's it, folks—how you deploy the Nutanix CSI driver using Rancher Fleet and test it with a test app.
For everybody's reference, I have made the rancher-demo repo on GitHub publicly available. Enjoy:
Tune in for the next post in the series: